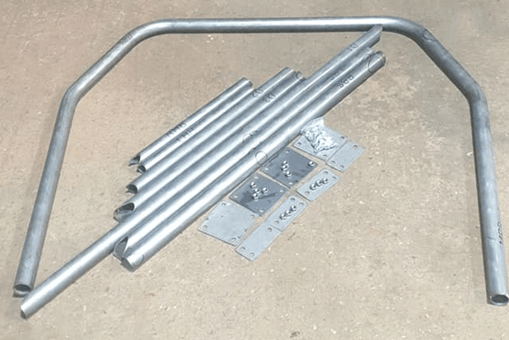
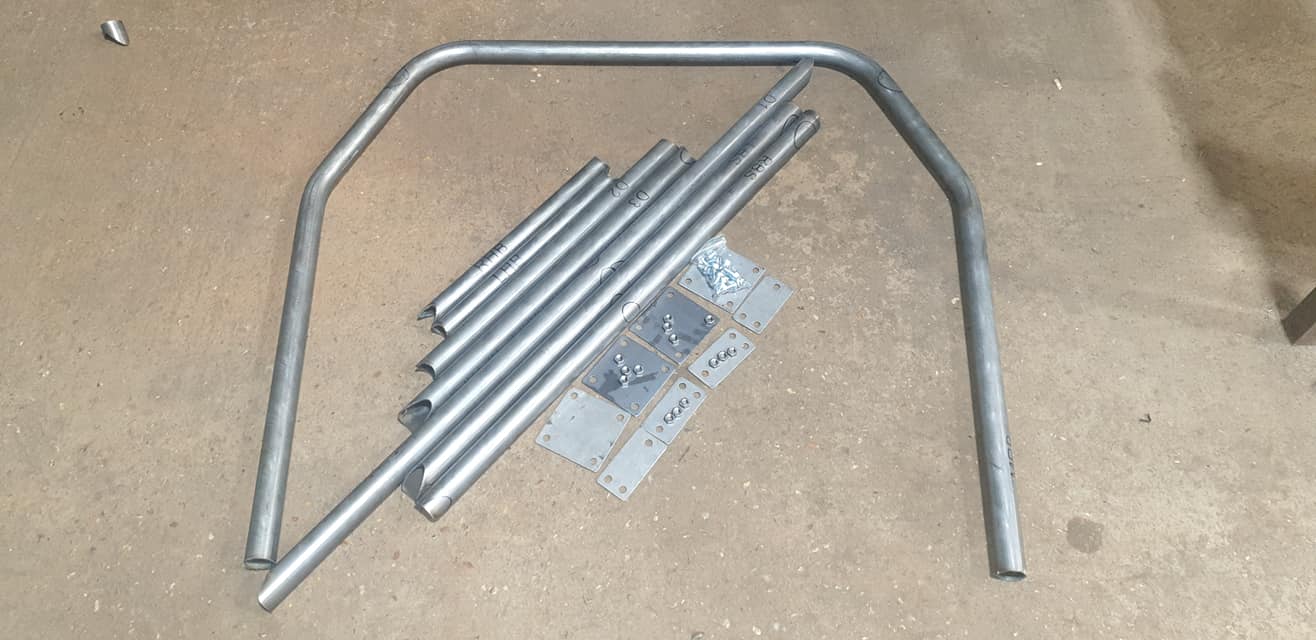
SUZUKI JIMNY DIY WELD IN INTERNAL HALF CAGE KIT (Material: Standard CDS)
Whats included?
X Bracing components
Main roll bar
Left and right back stays
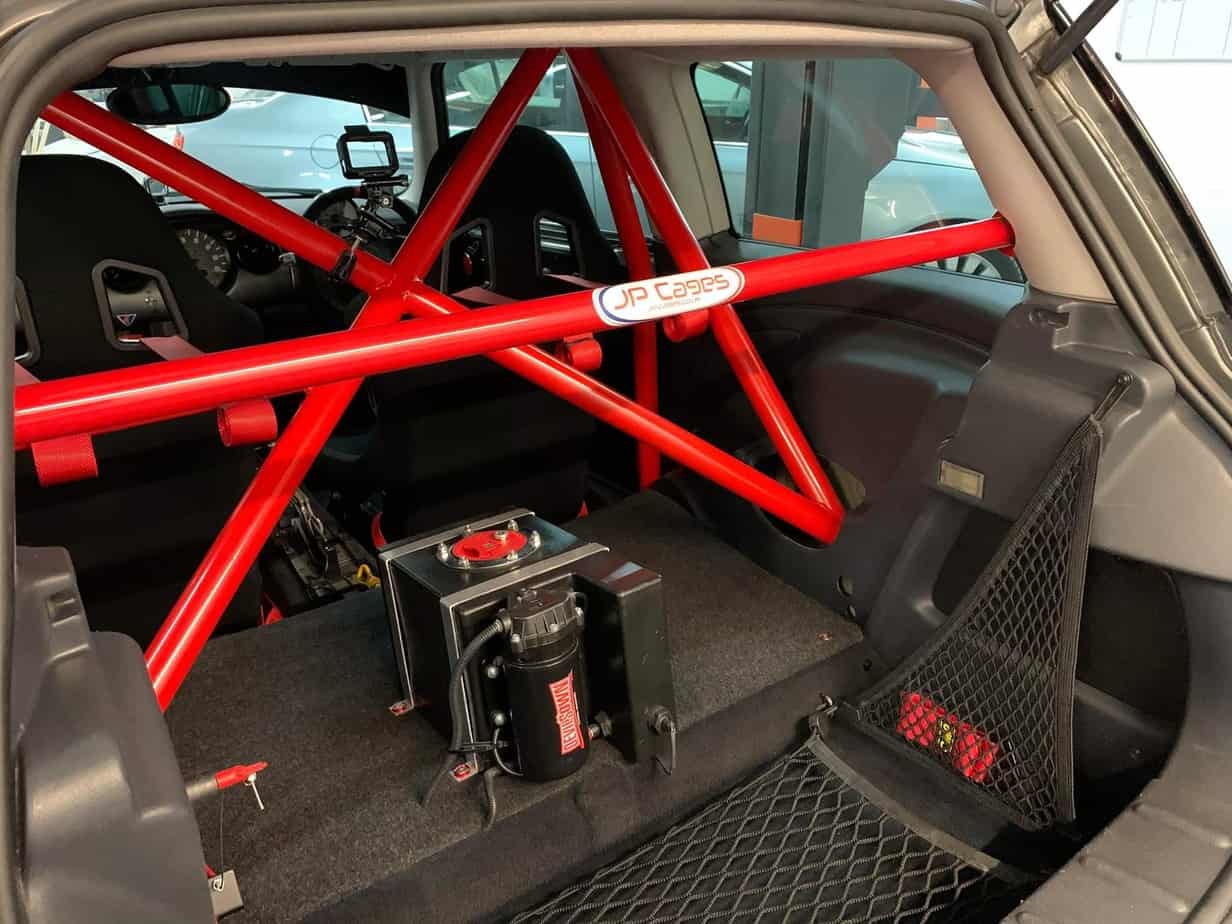
Harness bars
Mounting boxes/plates
This kit is Designed for easy assembly for anyone with welding and fabrication abilities.
The Kit is CNC notched, marked and labelled.
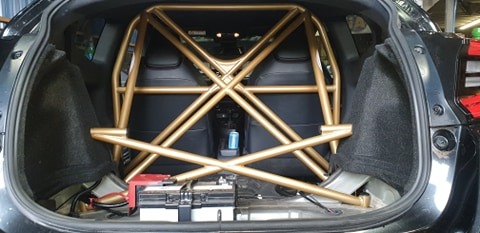
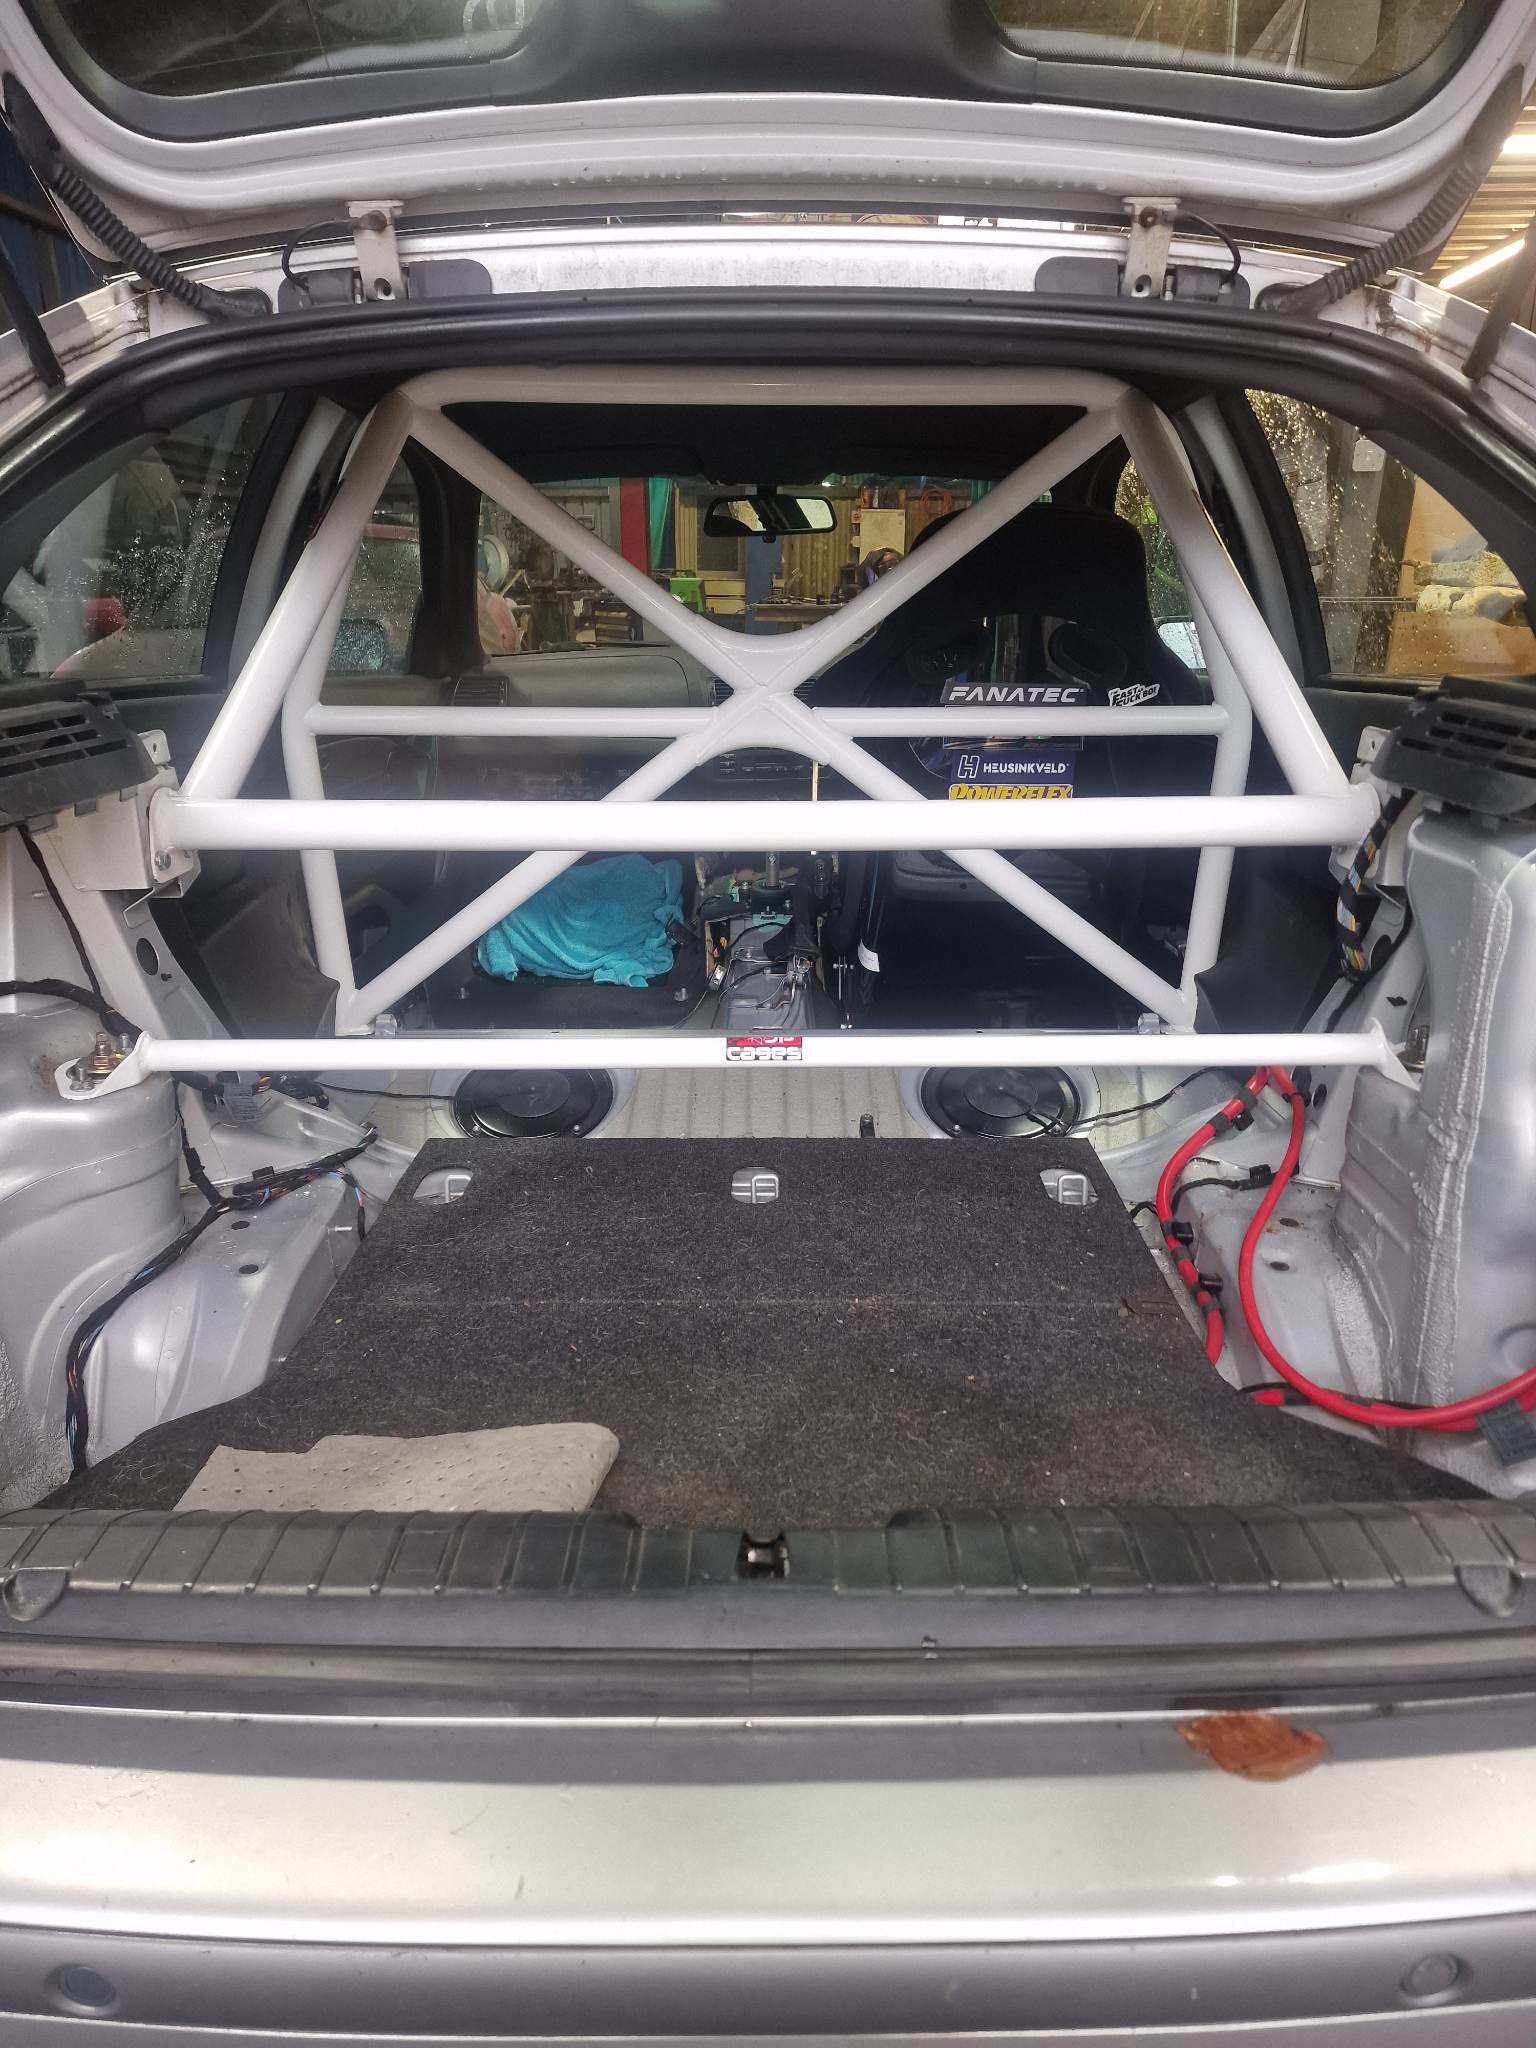
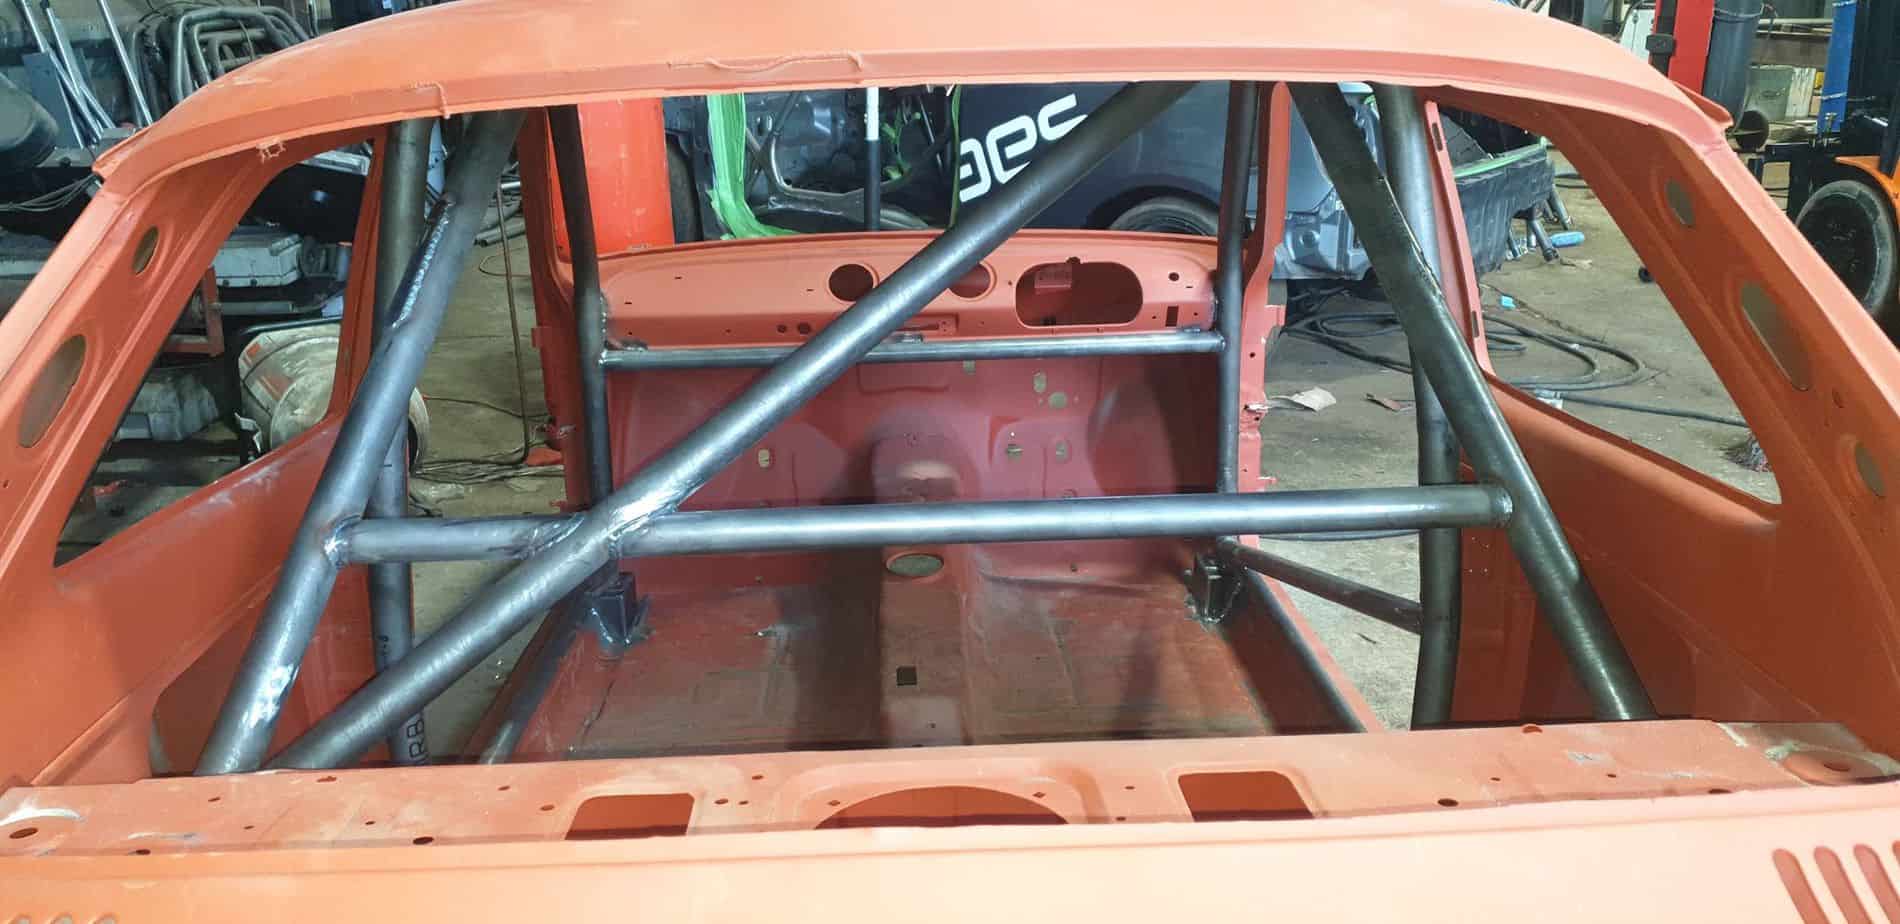
Use the images for reference on mount positions, the front mounts push into the corners and you position the hoop on top to suit.
Look at the images below for reference as to where the mounts sit, use this to gauge where to clean the paint/sealer from, give your self a good size area to work with, this will save lots of time, then your mounts can be tacked straight down to build up from.
once prepped tack your front mounts in place as shown in the attached images, after cleaning all the ends of your tubes offer the hoop into position and tack it in place just to allow some movement of lean angle.
Offer your rear legs up to the positioning marks (RB and LB), your D1 should line up to the positioning marks, once in place you can then offer your D2 and D3 to create the X, the trick is to symmetrise the top and bottom and then pull the middles inline with a straight edge angle jig or eye it up with a straight edge to ensure the line is true. so long as the cage looks even/symmetrical thats all okay.
once your happy that everything lines up in the correct place in the car you can weld the joins as you go to ensure everything is welded before covering the joins with another tube.
you now have the cage positioned with its X, now you should have LH & RH , left, these are 38mm and are the harness bars, simply tack the LH and RH ones at the outside join only measuring from the foot up to ensure the height is equal from left to right, then apply a level across the back of the cage so you can eye up your straight line in the middle, you may need to fettle a little bit until you’ve got equal heights all the way across from left to right.
Abbreviations:-
MRB – Main Roll Bar
LB/RB – Left/right backstay
D1, D2, D3 – Diagonal 1 2 and 3 (D1 allways goes top over driver head)
LH RH – Left / right HARNESS BAR